
Real-Time Marketing for Mobile Apps: Introducing Our New On-Device Automation Tool
Starting in SDK 7.3, iOS and Android apps now have access to a powerful toolkit for scheduling automated behaviors with near-zero latency. An extension of the Actions Framework, On-Device Automation provides a simple API for scheduling responses to local analytics events by running actions on the device without requiring a round trip to the server.
Why Would I Use This?
One of the challenges in building responsive, automated engagement tools is latency. Sudden changes in a user’s location or screen activity can sometimes mean a very brief window of opportunity before that context is no longer relevant or grows stale.
On-Device Automation doesn’t replace server-side push automation, but rather complements it by providing an alternative when immediacy and interactivity are critical factors for your engagement strategy.
Real-Time App Engagement
Every mobile marketer is after the holy grail of serving up exactly the right information at the right time. On-Device Automation enables real-time, automated, behavior-based marketing that can delight your app users and capture engagement opportunities you might otherwise miss.
With On-Device Automation, you schedule actions to be run when a trigger of your choice meets its goal. The actions available include all those you know and love, and triggers are bound to specific analytics and app lifecycle events. Here are few of the trigger types to choose from:
-
App foreground
-
App background
-
Screen tracking
-
Custom events
-
Region events
In other words, On-Device Automation let you describe rules like “display a particular message when the user navigates to a particular screen,” with options for frequency limits and start and end dates for designing self-canceling campaigns.
We’ve exposed APIs in the SDK for defining and scheduling these rules in native code, but we’ve also added a new action that makes it possible to send these schedules remotely in a silent push notification.
If all this sounds familiar, it should! Those developers already familiar with our existing server-side API for push automation will feel right at home, as there are many conscious similarities between the two, the obvious difference being that On-Device Automation is concerned with running actions in the app, whereas push automation deals more generally with push notifications.
On-Device Automation gives you access to in-app engagement actions with near-zero latency and fewer connectivity requirements. Server-side automation, on the other hand, has the advantage of user profile and segmentation context but always requires connectivity, and can make fewer latency guarantees.
Example: Automated Welcome Message
Enough talk, let’s dive into a more concrete example: displaying a welcome message once the user has spent a bit of time in the app. Our fictional app, EmojiMaster 9000, is free but derives its revenue from in-app purchases of premium emoji character sets.
The strategy here is to wait until the user has had some time to explore the app before presenting a welcome message inviting them to install some premium content on the house.
In order to avoid annoying or confusing the user, we want to do this a few moments after the user has foregrounded the app for the third time, and only display the offer once.
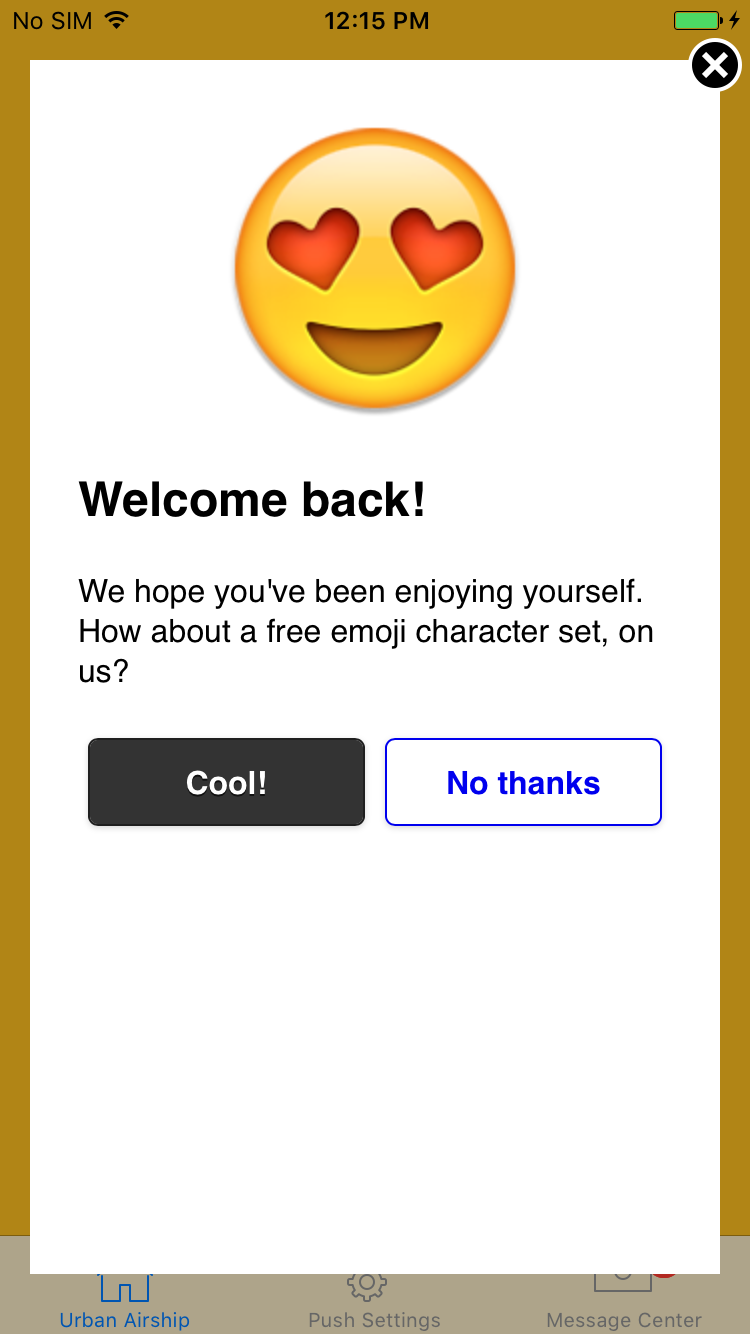
If the user taps the “Cool!” button, the app should follow a deep link to an in-app purchase section within the app.
To make this experience even stickier, we also want to prompt the user to share something about the offer on social media upon completing a purchase. We’ll assume the app is programmed to emit a custom event with the name “welcome_purchase” in this scenario, which we can use to automate the second dialog.
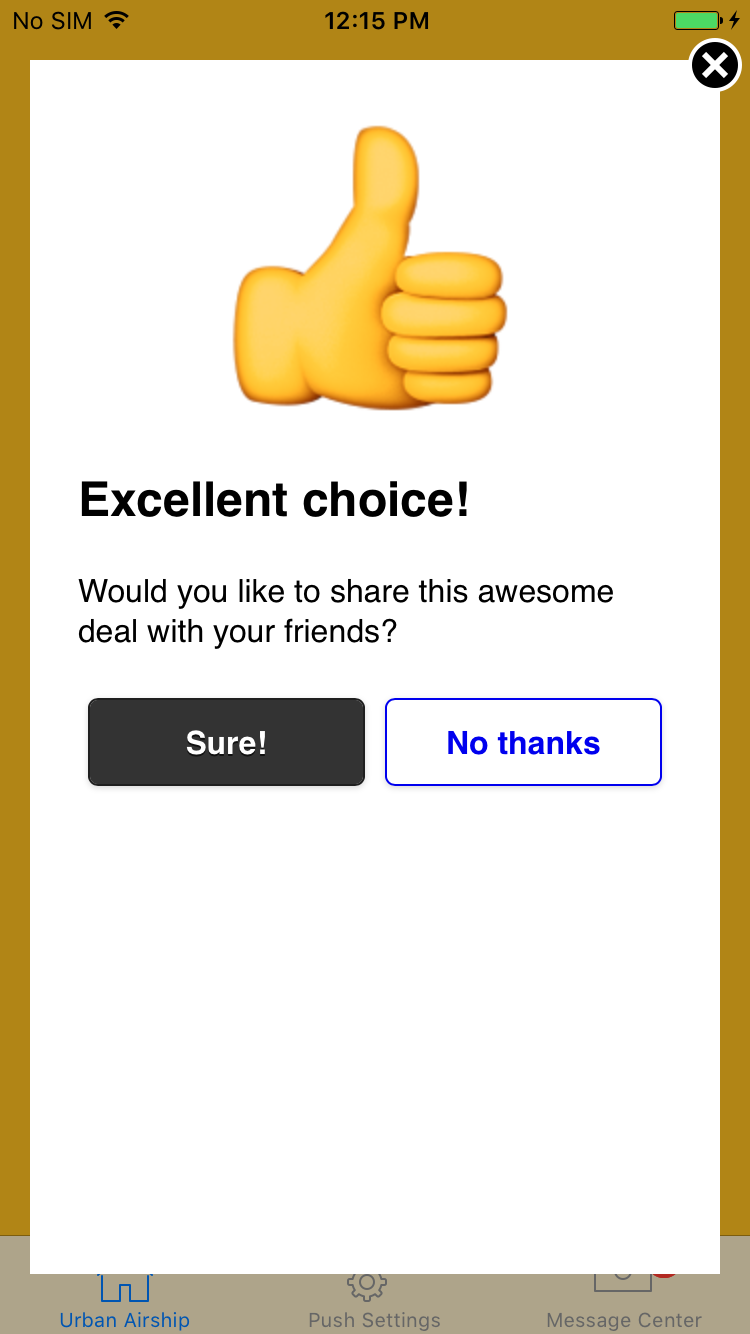
When the user taps the “Sure!” button we want to display the standard UI for social media sharing, where the user can choose between multiple apps.
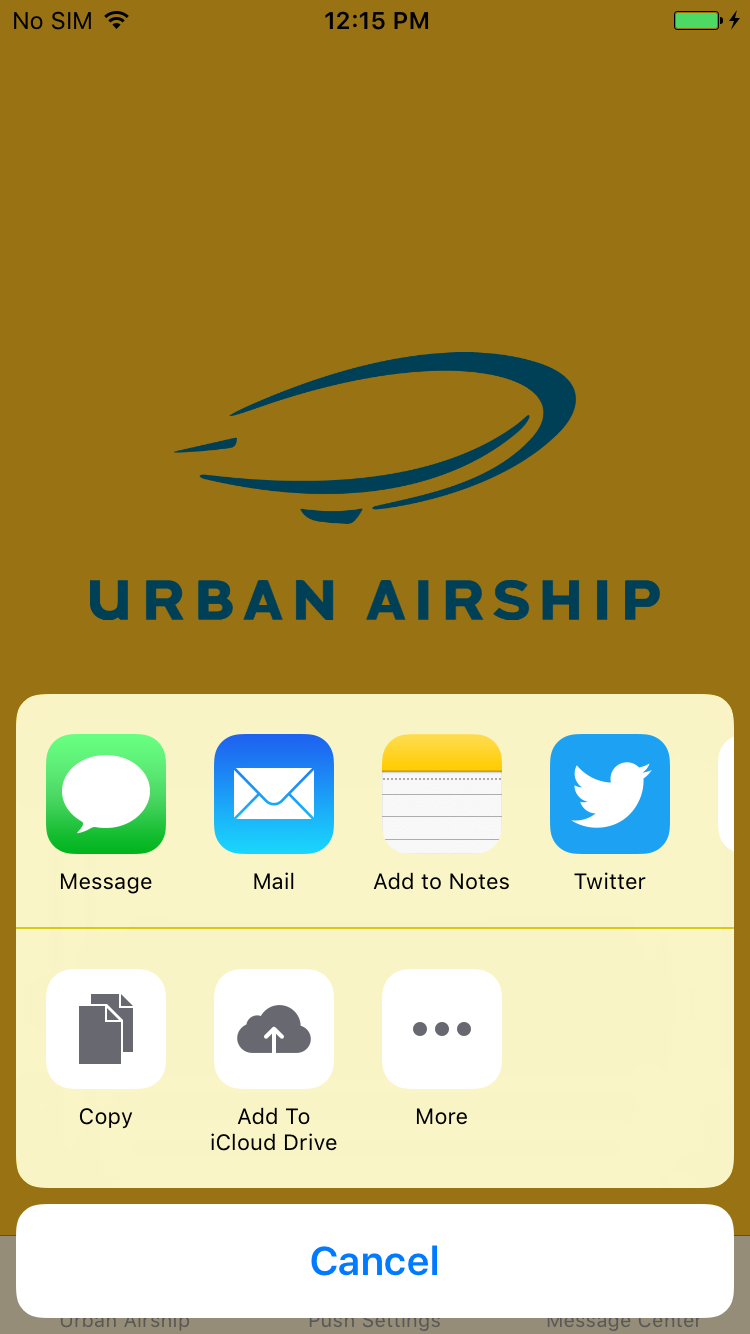
In this case, selecting Twitter should bring up a window allowing the user to post to Twitter with text already filled out for them, according to the needs of the campaign.
Getting Started
Now that we have a general description of the problem, let’s see how this looks in practice. While all the above might sound complicated, it’s a rather straightforward affair with On-Device automation.
We’ll be scheduling two landing page actions, in order to display the welcome message and the social media share invitation, respectively. The welcome message will be automated using a foreground trigger, and the share invitation will be automated using a custom event trigger matching the “welcome_purchase” event discussed above.
{
    "schedule_actions": {
        "actions": {
            "landing_page_action": "https://mydomain.com/welcome_page.html"
        },
        "limit": 1,
        "start": "2015-04-01T12:00:00",
        "end": "2017-05-01T12:00:00",
        "group": "campaign 1",
        "triggers": [{
            "type": "foreground",
            "goal": 3
        }]
    }
}
{
    "schedule_actions": {
        "actions": {
            "landing_page_action": "https://mydomain.com/share_page.html"
        },
        "limit": 1,
        "start": "2015-04-01T12:00:00",
        "end": "2017-05-01T12:00:00",
        "group": "campaign 1",
        "triggers": [{
            "type": "custom_event_count",
            "goal": 1
        }]
    }
}
You may notice that the button actions mentioned above, namely the deep link and the share activity UI, are not represented here. This is because they are tied to user interactions, not automation.
Designing landing pages along these lines is beyond the scope of this post, but assigning actions to buttons is quite easy. Below are example scripts for these using jQuery for button bindings, and the Native Bridge for running their respective actions.
  $( document ).ready(function() {
    $('#yes-button').click(function(){
      UAirship.runAction("deep_link_action", "myapp://my-deep-link");
      UAirship.close();
    });

    $('#no-button').click(function() {
      UAirship.close();
    });
  });
  $( document ).ready(function() {
    $('#yes-button').click(function(){
      UAirship.close();
      UAirship.runAction("share_action", "I just got a free character set for EmojiMaster9000! #emoji #sweetdeals");
    });

    $('#no-button').click(function() {
      UAirship.close();
    });
  });
Automating With Care
Because On-Device Automation is tied to the app, developers interested in exploring these features should exercise caution when scheduling actions.
For instance, while it’s possible to cancel schedules with a push notification, the best-attempt nature of push delivery means not all devices will necessarily receive the cancellation, and schedules are therefore best designed not to rely on remote cancellation to ensure a smooth user experience. With that in mind, here are a few suggestions:
- Make thoughtful use of start and end dates: Unless you can think of a reason to create an action schedule that remains on the device indefinitely, pick a start and end date for your schedule so that it will cancel itself automatically.
- Give schedules frequency limits: In a similar fashion, unless you can justify an action schedule that can be triggered repeatedly, give your schedule a frequency limit so that it will cancel itself after triggering. If you’re not sure what number to assign your frequency limit, it should probably be 1 (run the action once and then cancel).
- Test schedules in development: This may be common sense but it bears repeating: always make sure to test an On-Device Automation schedule in development before unleashing it on the public. It’s better to catch a mistake early on, amongst your team, than to find out about it from your users.
Closing Thoughts
We hope this post provides some inspiration for ways you can leverage On-Device Automation in your app, and we look forward to seeing what you dream up! For more information, check out the iOS and Android platform docs.
Let's brainstorm some ways you can use this new feature! Get in touch; we'd love to help you check the boxes on your real-time marketing wishlist.
Subscribe for updates
If the form doesn't render correctly, kindly disable the ad blocker on your browser and refresh the page.
Submit
Related Posts

Webinar Recap: Boost Email Engagement with Real-Time Marketing Insights